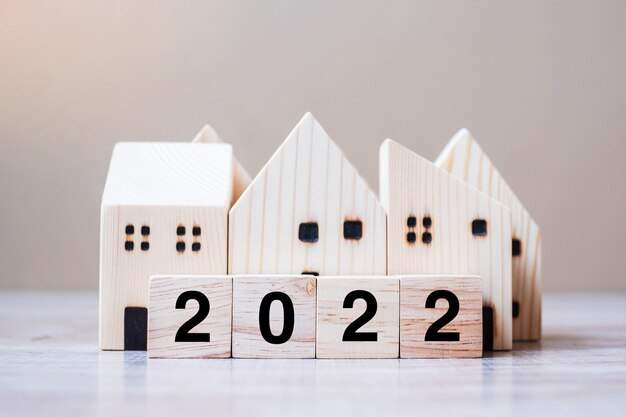
As summer approaches, some folks may be taking a closer look at their outdoor spaces and thinking about the projects that could make them more comfortable. Perhaps this is the summer you invest in outdoor seating that better suits your needs or plan for the patio or grill setup you’ve been dreaming of — to enjoy with your family in the short-term, and with others when social distancing relaxes.

We’ve rounded up a number of outdoor upgrades — ranging from smaller investments like adding a patio umbrella or string lights to more extensive projects like installing a deck or outdoor kitchen — that can help make outdoor living easier and more enjoyable. Take a look and tell us, could you see your backyard benefiting from one of these features or setups?

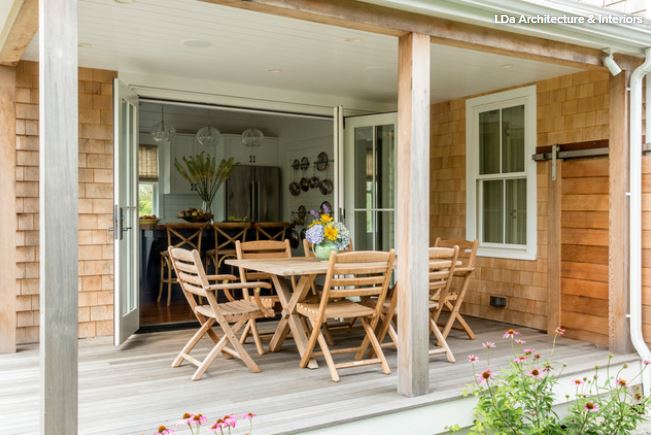
1. Add a Patio or Deck

If most of your garden is lawn or planted areas, investing in a patio or deck can be a real boost for the ease of outdoor lounging. Outdoor furnishings like tables and chairs sit more firmly and move more easily on a hard, even surface. Decks that are brought up to the same level as a home can foster better indoor-outdoor flow and make it easier to bring a tray of food to an outdoor dining table.

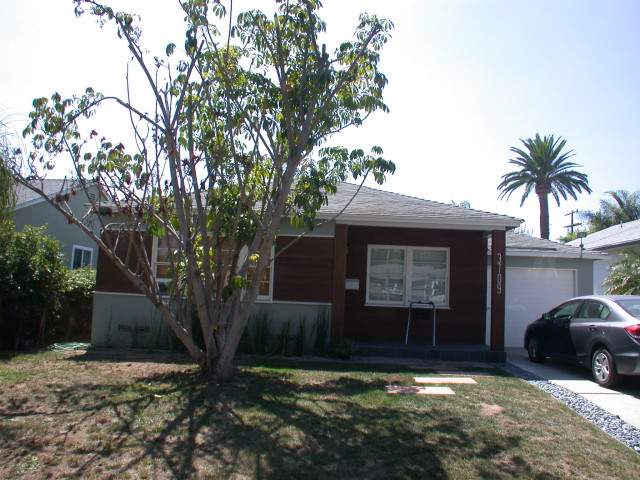
A deck or patio doesn’t have to be massive to be useful. In this home in Southern California by Christiano Homes, a small deck provides a room for the homeowners to relax on two lounge chairs right off the living area.

2. Splurge on Comfortable, Durable Furniture

The more you can bring the comforts of home outside, the more you will be tempted to sit back, relax and enjoy. Choose chairs that support your back and sofas and lounges with deep comfort. Invest in durable materials such as teak, aluminum, synthetic resin and powder-coated steel, which can withstand exposure to the elements, and choose cushions made from water- and UV-resistant fabric.
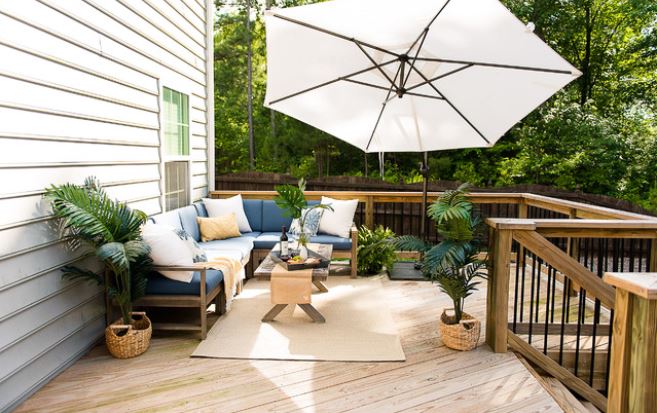
3. Consider Shade

If your primary outdoor hangout spot is in full sun, you’ll likely appreciate some form of shade while eating or lounging outside. Go big with an outdoor pergola, which can also be used for hanging string lights or mounting heaters, or keep it simple with some outdoor umbrellas that can be moved around as needed.

4. Add Light Sources

To keep the festivities going (or at least to be able to see what you’re flipping on the grill) after the sun goes down, outdoor lighting is essential.

Tucson-based landscape designer Elizabeth Przygoda-Montgomery of BOXHILL used multiple light sources in this desert oasis garden, including a flickering fire pit, trees wrapped in white lights, wall-mounted lights, path lights and whimsical floating bobbles. The designer recommends investing in commercial-grade outdoor lighting, which can stand up to the elements and often comes with a 10-year-warranty.

When planning your outdoor lighting setup, be sensitive to wildlife and neighbors. Add only what lighting you need and try to use recommended techniques and fixtures for wildlife friendliness.
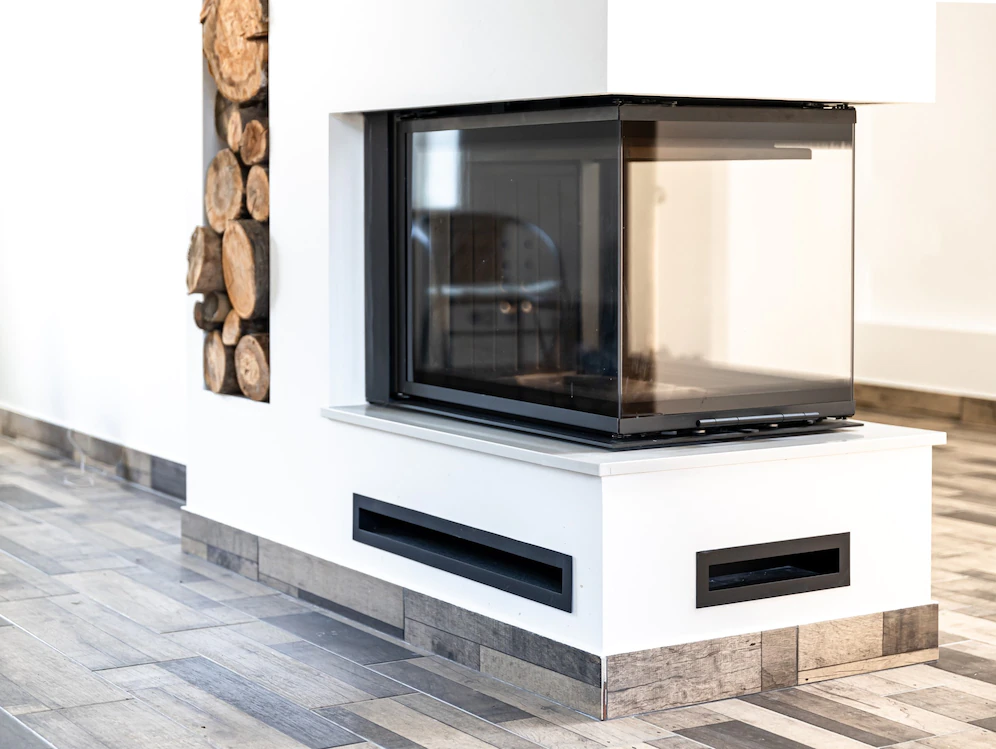
5. Provide Heat

Equally as important as light after dark, heat sources can encourage lingering on the patio or over dinner outside once temperatures dip. If you already have a pergola, eaves, or other roof structures, installing wall-mounted electric outdoor heaters is likely the easiest, least visually obtrusive option. Otherwise, plan on having a few freestanding propane heaters that can be rolled onto the patio when needed.

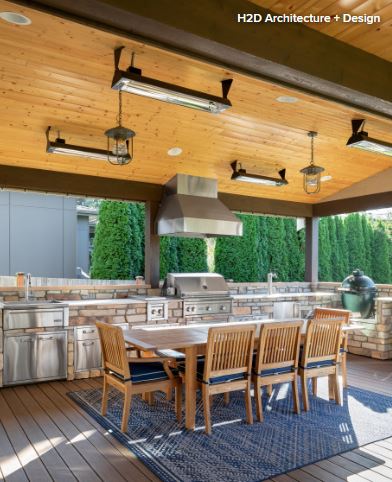
6. Invest in an Outdoor Kitchen or Grill

Cooking outdoors always draws people to the action. Outdoor kitchens are often one of the biggest splurges in a backyard design, but they can be worth the investment if you plan on frequently cooking and hosting outside. Depending on your budget, you may also want to consider party-ready features, like warming ovens, ice makers or drink fridges. Alternatively, a fairly basic barbecue will only set you back about $150, and the food will likely be no less delicious than that cooked on a far fancier outdoor kitchen.

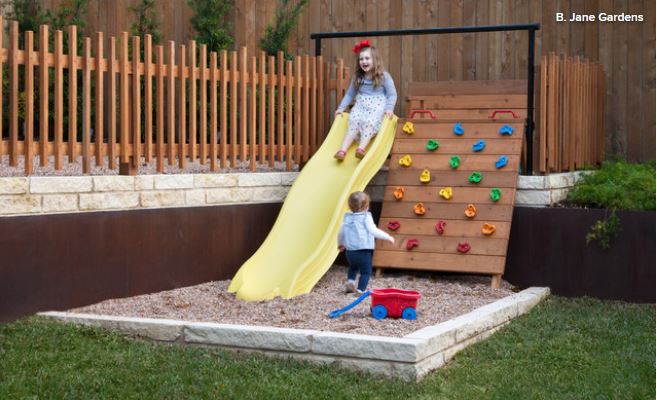
7. Give Kids a Place to Play

What’s one sure way to get parents to relax and enjoy their yard? Keep children entertained, but within eyesight (for youngsters). When landscape designer B. Jane was remodeling a backyard for a family in Austin, Texas, adding a kids’ play area that was close to the outdoor entertaining space was one of her clients’ top priorities. The designer took advantage of a natural slope in the yard to create a slide and custom climbing wall for kids to enjoy.

8. Build In an Activity Area

Whether you have the materials on hand for cornhole, croquet or another lawn game or go all out and install a bocce court, having the option of an outdoor game can help liven up a backyard. Conversely, you can rally around a food-related activity such as making pizzas in an outdoor oven or on the grill or making s’mores for dessert around a fire pit.

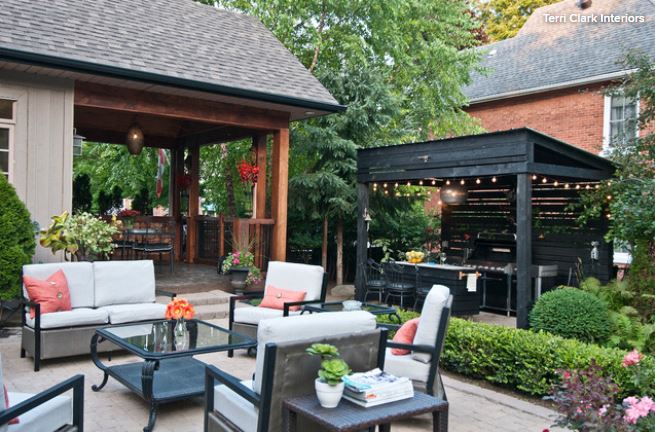
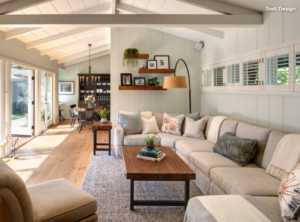
9. Create Multiple Hangout Areas

When interior designer Terri Clark set about designing her Toronto backyard, she knew she wanted to create a layout that would enable her to host friends and large gatherings. A large patio under an outdoor pergola allows Clark to set a table for 20 people, while smaller patios close to the house provide a more intimate dining area and seating for medium-size groups. Pathways and open areas foster flow between the spaces.

This article was originally published at Houzz.com.

Exterior Makeover

Whether you’re giving your home a minor makeover or a major face-lift, updating the exterior is a great way to make a positive first impression. The following exterior transformations range from minor (new paint and a garage door) to major (a raised roof to create a usable second floor).

Check out all five exterior makeovers, then let us know which one is the most welcoming to you.


Before

1. Bold Bungalow Makeover

Before: These Los Angeles homeowners knew it was time to refresh their 1950s bungalow. They used Houzz to search the profiles of local architects and landed on Lewis / Schoeplein Architects. The firm worked with the homeowners to completely re-imagine the interior of the house as well as give the former wood-and-stucco exterior a modern makeover with a slight industrial touch.


After

After: The exterior now features siding panels made of fiber-reinforced cement, a durable surface that comes in a variety of colors; it gives the exterior its modern industrial look. “They didn’t want a glass box. They wanted something warm. It’s something we really came together on from a design standpoint,” principal architect Toni Lewis says.

Almost everything else also is new, including the windows, mailbox and landscaping. All of the landscaping is drought-tolerant, with a focus on California native plants.

2. Wood and Windows That Wow

Before: This midcentury home in Lafayette, California, was nestled within the surrounding woodlands, but it didn’t take full advantage of its lush surroundings. The homeowners reached out to ODS Architecture to refresh the home by changing the roofline to accommodate higher ceilings, and by installing new windows and doors to provide more expansive views. The team also added a gorgeous stained wood siding on the exterior’s lower level, and stucco for the main level, chimney and overhang.


After


After: The bottom level of the house is now clad in stained vertical-grain western red cedar siding. The main floor’s exterior is covered in a warm dark gray stucco. A lighter stucco appears under the roof overhangs and the chimney, providing visual contrast. “With all the windows on the main floor, we needed a solid element rather than siding,” architect Alan Ohashi says. “There’s actually a lot going on in this simple-looking facade.”


Before

3. Modern Touchup for a Midcentury Gem

Before: Except for regular maintenance, the exterior of this Boulder, Colorado, house hadn’t changed much since it was built in 1966, in a modern ranch style that was popular for the neighborhood.

The new owners loved the home’s vintage architecture but wanted to modernize it — without losing its charm. To help with this balancing act, they worked with interior designer Kate Van Sluyter of Kimball Modern Design + Interiors, who lightened up the house inside and out.


After


After: Newly painted siding and a new garage door and entry have updated the home while keeping the original appeal. Black-frame windows also add a modern spin, as does a spiffed-up front landscape. “We kept the original red brick trim, because that was something the new owners loved,” Van Sluyter says. “For contrast, we went with a cool blue tone for the front door.”


Before


4. Contemporary Cool

Before: After finding a house in Fairfax, California, that was ideal for their family of four, this couple hired architect Craig O’Connell to help them update it to suit their more contemporary tastes.

The plain yellow home was built in the 1950s but had a style that wasn’t exactly the midcentury modern the homeowners were looking for. “The house is basically a ranch with a rumpus room over the garage,” O’Connell says.

After


After: The biggest changes to the exterior were painting the existing siding a fresh white, replacing the windows with mullion-free fixed and casement windows, and adding a modern garage door with translucent glass panes. The original brick chimney was left untouched. New plantings around the house offer a more contemporary vibe.


Before


5. Raise the Roof

Before: This couple loved their Noe Valley neighborhood in San Francisco, but after having two kids, they found that the small, dark spaces in their 971-square-foot house weren’t conducive to a homey family life.

Architect John Lum saw potential in the Edwardian home’s roofline and backyard, and knew he could come up with something that San Francisco’s Residential Design Advisory Team would approve.

As for his clients’ approval, he used Houzz ideabooks to get a sense of their style early on in the process. “I always ask my clients to share photos and to tell us what they like and what they don’t like about them,” he says. “It really helps us zero in on a design they will like.”

After

After: Lum maintained the original style of the exterior while raising the roof a few feet. He kept the gabled front, matched the new windows on the attic level to the existing windows and used the same cove siding. But he added a few modern touches, such as cedar accents, a new garage door and a brighter color palette. “These little touches indicate that there’s something else happening inside here,” he says.


This article was originally published at houzz.com.

Maintaining a Zen-like space is about much more than style. It’s about cultivating a peaceful place where each object has a reason for being present, whether for its beauty, utility or both. Here are 10 ways to bring a peaceful, balanced feeling to your home.

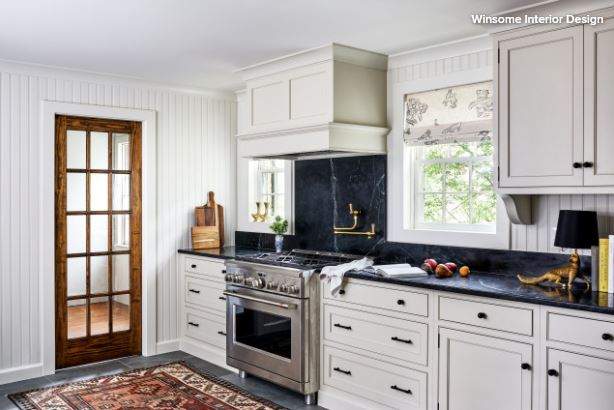
1. Clear Surfaces Daily

Clutter is visual distraction. Every time your eyes land on a stack of papers, a tangle of jewelry or a pile of laundry, some small part of your mind is at work thinking about dealing with said items. If you want a calmer experience at home, a good way to begin is by making it routine to clear all the surfaces in your house daily. When your eye can skim across clean, clear surfaces throughout your home, it also becomes easier to stay focused on the present moment.

2. De-Clutter and Get Organized

It’s one thing to clear surfaces; it’s quite another to completely declutter your home. But when you have taken the time to go through every closet, drawer and cupboard and whittle down your belongings to the ones you truly need, love or both, a weight lifts. Daily tasks that used to take forever are streamlined; lost items are quickly found; important dates are no longer missed.

3. Get Some Help if You Need It

Sometimes it’s best to admit you need help and let the pros do what they do best. Hire a professional organizer to help clear that clutter, a decorator to help you tap into your style and get your home looking and feeling just the way you want, or an architect to redesign your space.

4. Incorporate the Five Elements

Don’t stop with potted plants — to really embrace nature in your home, make sure all five elements are represented. They are: water (images of water, a fountain, flowers in a bowl of water), earth (stone, plants), fire (candles, incense, fireplace), metal (furniture, tools) and wood (furniture, beams).


5. Keep Floors as Clear as PossibleSimilar to keeping surfaces clear (see item No. 1), having clean, clear floors is a way to streamline your life and keep your attention on the here and now. If piles of things tend to accumulate on your floors, perhaps it’s because there isn’t a better place for them — if that’s the case, make a home for these items so you won’t be tripping over them anymore. As for the floors themselves, keeping them fresh, clean, and dust free makes for a more pleasant space and helps improve indoor air quality.

6. Use Fewer But More Meaningful Decorations

Instead of binging on inexpensive finds, aim to reduce your decor items to include only the ones that you truly love and that hold meaning for you. A few beautiful objects carefully displayed can be so inspiring — reducing allows you to appreciate what you have even more.


7. Soften Your Lighting

Learn to appreciate natural light and use it more. Even when the light starts to fade in the evening, consider sometimes lighting candles instead of flicking on the overheads. And speaking of overheads, if you haven’t done so yet, swap out all of your regular light switches for dimmers — it makes a world of difference to be able to control the glow.

8. Pay Attention to Texture

Do the objects in your home thrill your senses? Consider this as you declutter and whenever you are considering a new purchase. Think of how lovely a chunky, hand-thrown pottery mug feels in the hand versus a machine-made version. Natural materials have some of the best textures — bring more rough jute, nubby linen, cracked old leather, pure silk and raw wood into your home.

9. Use Natural Scents

Have you ever noticed that some of the most beautiful, inspiring shops usually also smell amazing? Or how just the first whiff of aromatherapy oils in a massage therapist’s office instantly puts you at ease? What you smell can have a surprisingly strong effect on how you feel. Create a purifying, calming atmosphere in your home by eschewing artificial fragrances and choosing natural scents like those from beeswax candles, essential oils, natural cleaning products and fresh garden flowers instead.

10. Use Everyday Reminders

In meditation practice sometimes a bell is used as a reminder to refocus your attention on the here and now. Create a list of some things you do multiple times each day, and pick one of them to use as your own version of a meditation bell. It could be anything, as long as it’s something you do often — adjust the window shades, wash your hands, pour a glass of water, check your email. Whenever you find yourself about to do that thing, take a moment to stop, breathe and simply be present.

home in field in spring

With the days lengthening and weather warming, spring is a good time to get outdoors and tackle some larger home projects. With the threat of winter storms past, you can look for damage and make any needed repairs, as well as prep your home and garden for summer. We spoke with an expert to get some tips on what to watch for this season, from proper irrigation to mosquitoes and termites (oh my!).

Tasks to Check Off Your List in an Hour or Less

Inspect driveways and paths. Freezing and thawing are rough on concrete, asphalt and other hardscape materials. Take a walk around your property to look for damage to walkways, paths and driveways, then schedule repairs as needed. Asphalt can often be patched, but damaged concrete may need to be replaced entirely.

Keep an eye out for termites. Beginning in March and going through May or June, be on the lookout for these winged insects. “Termites swarm in the spring,” says Victor Sedinger, certified home inspector. “If there’s a bunch of winged insects flying out of a hole in the woodwork, that’s probably termites. Call a licensed professional pest-control company. You’ll save money and trouble in the long run.”

Prevent mosquitoes. In recent years, we’ve become more aware of the potential danger mosquitos can pose to our health. “West Nile virus and Zika virus are just the latest diseases caused by these winged pests,” Sedinger says.

The best way to prevent mosquitos around your home is simply to get rid of any standing water. “Walk around your property [and peek at your neighbors’]. If you see anything or any area where water stands, fix it, tip it, get rid of it or maintain it regularly,” Sedinger says.

Tackle These To-Dos Over a Weekend

Wash windows. 
Clean the grime off glass inside and out for a lighter, brighter home indoors and increased curb appeal outdoors. Wash the exterior windows yourself by using a hose attachment, or hire a pro to get the job done.

Clean gutters and downspouts. After the last frost has passed, it’s important to have your gutters and downspouts cleaned and repaired. “Clogged gutters and downspouts can cause the wood trim at the eaves to rot, and that can invite all kinds of critters into your attic space,” Sedinger says.

Having your gutters and downspouts cleaned early in the season can also help prevent damage from spring rains. “Gutters and downspouts should be clean and running free,” Sedinger says. “If your downspouts are installed properly, water is diverted away from the house so that no water collects around your foundation.”

Clean your fireplace. If your home has a working wood-burning fireplace, the end of winter is a good time to give it a fresh start. Protect your hands with gloves and cover the area around the fireplace with a tarp. Carefully remove the (completely cool) remains of any charred logs and ash using fireplace tools. Then gently clean the fireplace surround. Do not attempt to clean inside the chimney — that job should be left to a professional chimney sweep.

Check sprinkler and irrigation systems. Checking your sprinklers or irrigation systems in the spring can save water — and your plants. Sedinger shares these tips for checking your watering system:

  • Run the system through all the zones manually and walk the property.
  • Make sure none of the sprinkler heads are broken or damaged.
  • Adjust any heads that are spraying the house, especially windows, as this can cause moisture problems.
  • Adjust heads that are spraying the street, sidewalk or porches to avoid wasting water.
  • If you don’t know how to maintain your system, call a professional. You’ll save money on your water bill and protect one of our most valuable natural resources.

Check screen doors and windows. Screens are designed to let the breeze flow in and keep the bugs out, but they can only do their job if they’re free from holes and tears.

Before setting up your screens for the warm months ahead, be sure to carefully check each one and repair any holes or tears, no matter how small. You can find repair kits at most hardware and home-improvement stores.

Inspect the roof. Winter storms can take quite a toll on a roof. When spring arrives, start by making a simple visual inspection of yours. “It doesn’t require a ladder, and you certainly don’t have to get on a roof to look,” Sedinger says. “Use binoculars or a camera or smartphone with a telephoto feature if you need to.” Look for missing shingles, metal pipes that are damaged or missing or anything that simply doesn’t look right. If you notice anything that needs closer inspection or repair, call a roofer.

Paint exterior. If you’re planning to repaint your home’s exterior this year, spring is a good time to set it up. Want to paint but can’t decide on a color? Explore your town and snap pictures of house colors you like, browse photos on Houzz or work with a color consultant to get that just-right hue.

house deck

Reseal exterior woodwork. Wood decks, fences, railings, trellises, pergolas and other outdoor structures will last longer if they’re stained or resealed every year or two.

Take this opportunity to make any needed repairs to woodwork as well.

Schedule air-conditioning service. “Home inspectors see a lot of air-conditioning systems that are just not taken care of,” Sedinger says. “Just because it gets cool doesn’t mean it’s working efficiently.” To get the longest life out of your cooling system and keep it running as efficiently as possible, change the filters at least once each season, and hire a licensed professional to service the equipment before the start of summer.

This article first appeared on Houzz.com

The outlook for the global and domestic macroeconomic environment has been clouded over the past week by rising geopolitical tensions in Eurasia. In addition, rising inflation and faltering mortgage applications have added to the turbulence of U.S. financial markets. However, despite these challenges, California’s broader economy and its housing market are showing strength thus far in the face of rising headwinds. Home sales continue to exceed the pre-pandemic average, the market remains incredibly competitive, and active listings have finally tarted to rise in earnest in advance of the Spring home buying season. We even had a brief reprieve on interest rates last week. There’s no question that uncertainty has risen over the past 10 days, but the housing market continues to outperform expectations nonetheless.

Active Listings Statewide Trending Up After Long Winter

After falling in absolute terms for 14 of the preceding 15 weeks leading into the new year, active listings have been rising in California in 7 out of the first 8 weeks of 2022. Last week, the total number of actives rose above 20,000 for the first time since Christmas and are approaching levels seen at the beginning of March 2021. If the trend continues, listings could rise on a year-to-year basis for the first time in more than two years in March, which will provide much needed inventory to potential home buyers.

California Existing Home Sales Hold Up Despite Higher Rates

Despite the rapid rise in interest rates so far this year, existing home sales continue to hold up well. In fact, the first 4 weeks of February saw more homes close in California than during the same 4 weeks in January. Given that January’s pace of sales was still roughly 5% above pre-pandemic levels, this suggests broader resiliency for the market. Sales are still down on a year-to-year basis from the nearly 15-year highs where the market began 2021, but maintaining or exceeding last month’s level despite higher rates and still-depressed inventory levels is an encouraging sign that buyer demand remains relatively robust.

Mortgage Interest Rates Take a Breather Last Week

After rising precipitously during the first 6 weeks of 2022, the average 30-year fixed rate mortgage ticked down by 3 basis points in the latest Freddie Mac survey. This is only the second time in the past 10 weeks where rates have ebbed, and although the reprieve is expected to be temporary, it is welcome news for home buyers looking to lock in current rates before they resume their uptrend. Fortunately, 10-year Treasuries also saw a small reduction in rates last week and with mortgage spreads having increased sharply since the uptrend began, the mortgage market may see rates climb more slowly when they do begin to rise—especially in light of the geopolitical issues discussed in more detail below.

Home Sellers Taking Property Tax Base with Them

Although official statistics from the State Board of Equalization and from individual county assessors is not expected to be available for some time, there are some preliminary indications that some homeowners are taking advantage of recently enacted changes to move to a new home without losing their Proposition 13-protected property tax base on their current home. A survey of more than 800 California REALTORS® conducted late last year showed roughly 30% had worked with a seller who has or will transfer their property tax base to another home. For nearly 1 out of 4 of those, the ability to transfer their property tax base was the motivating factor in the sale, which suggests that property tax portability could help to unlock some additional inventory in 2022.

Global Tensions a Double-Edged Sword for Economy

The recent conflict developing between Russia and the Ukraine will introduce competing economic and housing market impacts in the weeks and months ahead. On the downside, this will introduce more inflationary pressures as global oil supplies from Russia are impacted by sanctions. Increased financial market volatility is likely as well, which could introduce macroeconomic headwinds as consumer pull back from lost wealth and rising prices. On the other hand, global turmoil will likely increase demand for U.S. dollars and for U.S. Treasuries, which could alleviate some of the recent upward pressure on interest rates and could result in less domestic inflationary pressures.


Need help navigating today’s housing market? Call or email us today, we can help!

Stainless steel is a beautiful finish, but to keep it looking its best, especially if you have a family of little ones, can be a big job. Here are a few quick cleaning tips to help you keep your stainless steel gleaming.

blue kitchen with stainless steel appliances
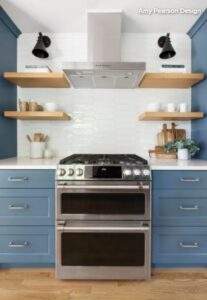
1. Remove Knobs for a Complete Clean

When cleaning your stainless steel range and oven, remember to remove the control knobs to reach hidden dirt and grime. Just cleaning around knobs can cause a buildup that’s unsanitary and hard to remove.

2. Stainless Steel Handles Need Extra Attention

Since the handles on your stainless steel appliances are used the most, they should be wiped down weekly with a damp microfiber clothsFine-woven microfiber cloths, such as the ones used for cleaning eyeglasses, can be found at retail chains and grocery stores. They work great to remove dust and don’t leave any streaks or smears. There’s no need for harsh chemicals to clean your stainless steel appliances and surfaces.

3. Fight Oxidization

Stainless steel oxidizes over time. To remove this film, you can use pumice powder mixed with water. Pumice powder can be found online and at most hardware stores. Apply this paste following the “grain” of the stainless steel then rinse with warm water. You will be surprised to see how black the cloth is when you finish.


kitchen with stainless steel countertops

4. Clean Those Countertops

Stainless steel countertops are the choice of professional kitchens because they are designed to hold up to constant abuse.

To keep them looking clean and shiny, you want to avoid using an abrasive cleanser. Instead, try using just a drop of a gentle dish soap and warm water. This mixture will keep your counters clean and scratch free.

5. Give Your Hood a Helping Hand

Stainless steel stove hoods need to be cleaned weekly to prevent a buildup of grease and dust. Cooking grease mixes with dust in the air and lands on the stove hood, making it thick and hard to remove. A simple cleaning remedy is to spray a cloth with rubbing alcohol and wipe it over the top of the hood. Make sure not to use the rubbing alcohol near an open flame.


white kitchen with stainless steel appliances

6. Banish Burn Marks

If you have some burn marks that just won’t come off your stainless steel stove, try this simple DIY recipe:

  • 1 cup baking soda
  • ¼ cup lemon juice
  • 3 tablespoons Borax
  • Club soda (for rinsing)

Combine the first three ingredients to make a cleaning paste. Apply this paste to the entire stained area with a soft cloth. Scrub in the same direction as the grain of the stainless steel. Rinse with club soda and wipe dry with a microfiber cloth.


This article was originally published on houzz.com.

How to Care for Your Christmas Tree


Artificial trees may have increased in popularity, but for the purist, only a real tree will do. No matter how realistic it looks, an artificial tree can’t compete with the scent and feel of a real evergreen. It’s a living part of nature that, for a short time, we give a place of honor in our homes.

And no matter which kind of tree it is — spruce, fir, pine or cypress — once it’s indoors, the goal is to keep the tree fresh and green. This means keeping the needles pliable and on the tree until the holidays are over. And the only thing that does that is water, lots of it, every day.

fully decorated christmas tree in sun room
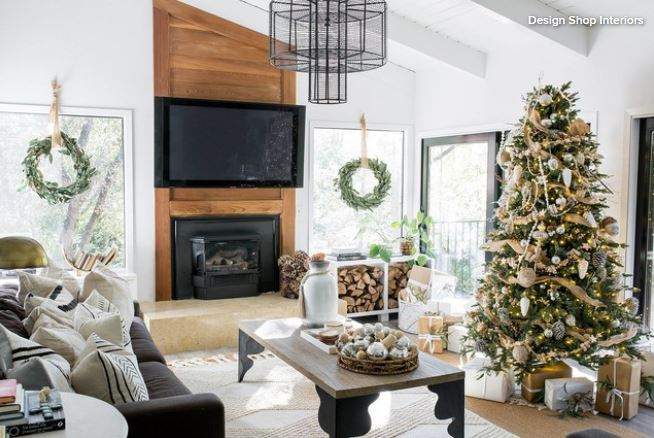
Get the Tree in Water Immediately

Once you get your tree home, put it into water as soon as possible, within eight hours. If the trunk wasn’t freshly cut at the place where you bought the tree, then saw an inch or two off the bottom of the trunk and put it in a tree stand filled with fresh water. If you’re not ready to set it up, put it in a bucket of water in a cool place. The water temperature doesn’t matter.

Use the Right Stand

It should comfortably fit the diameter of the trunk. Whittling the trunk down will only dry the tree out faster. The National Christmas Tree Association recommends that a tree stand should provide 1 quart of water per inch of stem diameter. Be sure the tree stand you choose has a large water reservoir. A tree can take up a gallon of water in its first few hours in the stand.

Water, Water, Water

Big trees mean lots of agua. Watch that the cut part of the trunk stays below the waterline. Adding aspirin, lemon soda or other concoctions to the water won’t extend the tree’s life, but it might sicken pets or children if they drink out of the water reservoir.

Once indoors, a live tree’s branches will relax and open. Allow enough space when siting the tree for the lowest branches to fall open and not get in the way of foot traffic.

christmas tree decoratedKeep the Tree Cool

To an evergreen that spent years growing in a field, your house is as dry as the Sahara Desert. Position the tree out of the sun and away from heat sources. Keep the temperature in the room as low as is practical.

As magical as it seems to come home to a sparkling tree, don’t leave the tree’s lights on overnight or when no one’s in the house.

Even with daily watering, cut trees will eventually dry out. When needles drop when you touch them, and branches droop so low that ornaments are hitting the floor, it’s time to take off the lights and decorations, wrap the tree in an old sheet, and take it outside.

You can saw off some of the tree’s branches and cover garden beds with them to protect plants, or turn them into mulch with a chipper or shredder. If you have the acreage, drag the tree to an out-of-the-way spot for birds and animals to use as cover. Most communities now collect spent Christmas trees and make mulch or compost from them, which they offer back to residents. The saddest end for a tree is for it to be hauled off to a landfill, instead of being turned back into soil — allowed to decompose and feed living creatures, the way nature intended.


This article was originally published on houzz.com.

dining room with large bay windows

As the holiday season approaches, you may be considering a dining room refresh — so it’s a good time to gather some design inspiration. Whether you’re looking to create something bold and showy or casual and comfortable, start with this countdown of the most-saved dining room photos of summer 2021.

dining room with contrast10. In Contrast
Beautiful palm leaves add a touch of nature to this transitional dining room in San Diego. Live Interiors leaned on a white-and-black palette for high-contrast drama, and used midtone wood chairs and a textured wood sideboard to provide visual warmth. A Sputnik-inspired chandelier adds a retro detail above the chunky black tabletop, while a geometric gray-and-white rug adds texture below.

dining room multiuse

9. Multiuse Nook
EKAA Studio added a multiuse wallpapered nook in this contemporary dining room in India, which has overhead cabinets, a wood bench and glass shelving for dinnerware and decor.  White-and-gray marble flooring anchors light wood chairs with fabric cushions around a wood-and-white table. A jewelry-like chandelier with five gold rings descends from a recess in the ceiling.

traditional rustic dining room

8. Traditional Meets Rustic
A crisscross white tray ceiling and wall moldings at different heights add layers of texture to this Charlotte, North Carolina, dining room by Pike Properties. The juxtaposition of hard and soft carries through to the rustic gray wood table and traditional chairs in a pale neutral color. A large patterned rug with an abstract design in shades of blue pools below the furnishings. A six-light chandelier with white shades and gold accents adds an elegant touch.

easy dining room

7. Easy Breezy
Situated between an outdoor pool area and a kitchen is this breezy Florida dining room full of wood, metal and glass details. Emcy Interior Design added two Windsor-style chairs to the ends of a wood picnic table with benches to create a setup with character and charm. Minimalist lights with exposed bulbs that point in different directions hang from a whitewashed paneled ceiling. And close by, glass-and-wood built-ins store wineglasses, serving bowls, charcuterie boards and books.

dining room with unique chandelier

6. Bubble Up
Haus Love Interiors hung a frosted bubble chandelier in the middle of this contemporary Indiana dining room to make an impactful design statement. Black window frames provide contrast to the muted notes of the light-colored walls, beige curtains and light wood table and accents. A winding wall mirror adds to the room’s sophisticated aesthetic.

dining room with large bay windows

5. Down by the Bay
This space’s large bay window with built-in seating is perfect for enjoying nature views or as extra seating for entertaining. J.P. Hoffman Design Build gave this Westwood, Massachusetts, dining room a solid wood table in the center of the room, tons of pillows and six high-back upholstered chairs to make it feel comfortable. A large chandelier in a light metal finish sits low above the table without obstructing views or encroaching on dinnertime conversations.

dining room with light wood furniture and green accent wall

4. Green Scene
Green is predicted to be a popular color in 2022. And this earthy Coral Gables, Florida, dining room by True Designs is a good example of why. A green accent wall and windows capturing leafy surroundings create a welcoming atmosphere. A wood floor, sideboard table and chairs adds to the forest-like feel, satisfying the homeowners’ love of nature. Meanwhile, gold in the chandelier, art frames and curtain rod complements the wood tones and brings in a contemporary touch.

modern dining room with bold accents

3. Bold Appétit
Dark wood flooring, black walls and a black-and-white stencil-like ceiling create a dramatic look in this Atlanta dining room by Pineapple House Interior Design. Black wingback chairs amp up the mood. Crisp white wall paneling and molding help break up the dark walls and add contrast. French country-style wood chairs, green accents and a beaded chandelier give this space eclectic elegance.

dining room with wicker accents

2. Natural Fibers
Pure Salt Interiors emphasized natural textures in this Orange County, California, dining area, using plenty of plant fibers and wood. A large round table with five Wishbone-style chairs and an oversize rope pendant light are front and center. A muted backdrop of white walls and curtains, dark stone countertops and pulls, glass cabinets and a sliding glass door bring balance and light to this laid-back dining space.

dining room with rustic accents

1. Wood Slab
Rich colors, materials and details come together in this Fort Lauderdale, Florida, dining room by DKOR Interiors. A serving area features a white marble countertop, backed by a stunning accent wall with deep blue tile set in a herringbone pattern. The tile also runs behind a recessed display area that holds plants, decor and cocktail items. Ceiling lights illuminate an abstract triptych hung on textured wallpaper, while two midcentury modern chandeliers hang over a natural wood slab table that can seat eight. An area rug with saturated blues, grays and browns ties all the room’s colors together.


This article was originally
published at houzz.com
kitchen makeover after

The combination of wood and white brings beautiful contrast to a kitchen. The natural look and feel of wood cabinets adds warmth, and mixing in bright shades of white creates a fresh, balanced look. Check out these before-and-after photos to see how pros designed three luminous kitchens with wood and white leading the way. Then let us know in the Comments which one you think had the biggest transformation.


1. Wood and White in the Light

kitchen before makeover
Before: An active family of five in New Jersey had been making good use of their existing kitchen, but it had issues. The homeowners desperately needed to replace a bare plywood panel on the dishwasher that was being used as a temporary fix. Upper cabinets were crowding the window above the sink, contributing to a lack of adequate lighting. There was insufficient counter space due to the layout. A small granite-topped island with seating for three didn’t function well for the family, and the uneven heights of the upper cabinets didn’t look good.

The couple hired interior designer Ioana Curovic to remodel their kitchen. After browsing photos on Houzz for inspiration, they decided they wanted a bright room with wood and white surfaces, clear lines and better flow.

kitchen makeover after

After: Curovic pushed the kitchen 5 feet into the backyard to create an additional 80 square feet. This let her bring in a more robust island with seating for four and incorporate a large three-pane window to flood the room with natural light. The new sink wall has a more open feel with no overhead cabinets, matte paint (Winter White by Benjamin Moore) and a hidden wood-paneled dishwasher.

Shaker-style white oak cabinets painted white and a modern white tile backsplash with bright white grout focus the eye on the oak-lined vent hood and custom gas cooktop wrapped in the same white quartz as the countertops. “A lot of the inspiration photos from the client included white with wood accents, which bring some nice warmth to the space,” Curovic says.

Stained red oak flooring throughout the kitchen and backless oak wood stools with iron bases help give the room new character. The upper cabinets and modern kitchen accessories add to the wood-and-white motif without adding clutter.


2. Wood, White and Blue

kitchen makeover 2 before

Before: Having lived in their Colonial-style Massachusetts home since 2000, these homeowners felt it was time to give their kitchen a new look. The couple hired designer Amanda Ortendahl and Maynard Construction to complete their kitchen remodel, including dealing with the overwhelming amount of wood cabinets and wasted floor space.

A ceiling soffit was causing the upper cabinets to sit low, leaving less space for the tile backsplash and food prep. Dark granite countertops that nearly circled the kitchen gave the room a heaviness. A peninsula with overhead glass-front cabinets separated the kitchen and formal dining area.

“I definitely think the layout before was functional for [the female homeowner], but they wanted to enlarge the kitchen, update the style and gain the functionality of all the accessory options you can get in cabinetry today,” Ortendahl says.

kitchen makeover 2 after
After: The design team started by stripping the kitchen down to its bare bones and removing the ceiling soffit. Ortendahl pushed the kitchen wall out 2 feet into the backyard and axed the peninsula and overhead cabinets. The additional 200 square feet allowed for a fluid U-shaped layout with an 11-foot walnut island topped with white quartz. Creamy white cabinets and a contoured walnut range hood set the tone for this wood-and-white kitchen.

Navy stools with gold legs as well as blue knobs on the stainless steel range add splashes of elegant color to the white countertops and rich walnut surfaces. The wood floors were refinished in a lighter color to add to the kitchen’s new look and feel.

“She wanted the opposite of the wood cabinets she had before — to keep things light but bring in the wood tones of the hood, island and floor for some warmth,” Ortendahl says.


3. White with Rustic Wood Touches

kitchenmakeover 3 before
Before: Seventeen years ago, when Todd and Tina Gifford were ready to transform their muddy brown kitchen, life and young children got in the way. Once the kids were grown up and out of the house, the couple hired designer Gina Loewer to give the space a new wood-and-white look.

Honey-brown floors that nearly matched the oak cabinets, along with laminate countertops and an aging cooktop on a narrow island, defined the old kitchen. A large desk area and a protruding fridge that hindered kitchen traffic became daily sources of inconvenience. “The kitchen just felt drab,” Loewer says. “It was enclosed, compartmentalized, and the aisleways were tight.”

kitchen makeover 3 after
After: Loewer started by opening up the back wall to expose a hidden dining room, adding 24 square feet and more natural light to the kitchen. Greige walls and maple cabinets, ceiling and trim in various shades of white brighten the space. A larger island with a hickory base, white quartz top and wood stools adds rustic charm.

The old honey-hued floors were refinished to complement the new island and decorative hickory beam. A stainless steel hood, range, soda fridge and double ovens provide a nice contrast to the neutral colors of the kitchen. A covered fridge that moved to a new wall maintains the design’s crisp white surfaces and black hardware.


This article was originally
published at houzz.com

“Open-plan layout” is a generic term used in interior design and architecture for any floor plan that makes use of large, open spaces and minimizes the use of small, enclosed rooms. They are, for the most part, free of interior walls or partitions. Open floor plans became popular in the 1970s, but over the past year, as people have been isolated at home, all that openness is causing some to reconsider. It turns out those walls, partitions and other barriers are useful for minimizing noise and giving a visual and physical sense of privacy. Here are 15 ways you can create that separation in an open floor plan.

1. Arrange the Furniture

This is definitely the place to start when it comes to defining zones for your interior, and it likely won’t cost you a thing.

Turning the backs of chairs and sofas to the rest of a space is an immediate way to signal a separate area. Rearranging your furniture to carefully create cordoned intimate sections may be the most powerful tip for redefining an open layout.

For example, if your living room is alongside your dining room, make sure your sofa has its back to the table or that your chairs are facing the fireplace, like in the space shown here. This will create a notion of separateness.

Having textured portions of wall, like the dramatic stone fireplace here, also helps visually signal different areas.

Adding surfaces behind furniture zones can also create a barrier. A console table behind a sofa, like shown here, is a nice way to add height and definition.

The more height you add to your console table in terms of accessories and items you place on the surface, the more of a visual barrier you’ll create. Consider tall vases, high stacks of books and table lamps.

2. Add an Area Rug

Another strong way to create a visually distinct area is through the placement of rugs on floor surfaces. They also enhance your decor and add softness to the overall space. Rugs are also great for absorbing noise, which is helpful when multiple activities are happening in one space.

Be sure you select a rug that is the appropriate size. It should at least fit the main piece of furniture, such as a sofa, on it.

If you’re unsure on what style of rug to go for, my recommendation would be a bold pop of color to really define the zone and give it a radically different personality.

3. Introduce a Folding Screen

One low-commitment way to divide a space is with a decorative folding screen. These vertical barrier pieces can also inject pattern and color into a room. And they can be easily moved around to other areas of the home or taken out completely when you’re ready for a full open floor plan again.

Notice how the screen here creates an intimate seating area while adding color and pattern. The striking light fixture carries weight and also helps define this space. At night, the light will punctuate the zone even more.

4. Accent the Ceiling

Sometimes the best ideas come from above. The inset ceiling in this living room is dressed in wallpaper and finished with multiple bulb lights. This feature stylishly characterizes the sitting area.

For a more subtle but still effective approach, consider enhancing a ceiling with paint or molding

5. Use a Bookcase

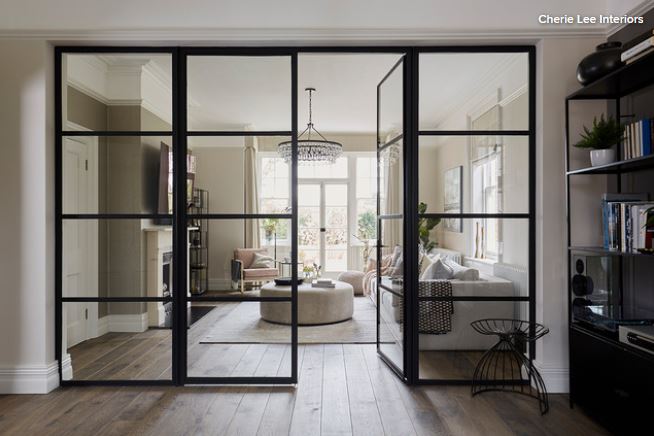
I love the idea of using an open bookcase to separate areas because it serves double duty: division and storage. Be cautious how you dress the shelves, though. I highly recommend that you do not stuff your bookcase to the gills. Leave some open space to allow brightness to filter through and highlight the objects.

Also, choose a high-quality, sturdy unit. This is not a piece to skimp on because you do not want this unit to tip over. You should always anchor and secure a freestanding unit that you’re using between spaces. Or, as in the example shown here, the bookcase unit is attached to the ceiling above and a pony wall below, ensuring it stays in place.

You could also consider a solid bookcase, which will create a more definitive separation. In that option, you could place two bookcases back to back, so you have storage on both sides or hang art on the back of one bookcase.

6. Put In Drapery

Curtains can go far beyond just dressing your windows. They can make a plush room divider too. It’s a look that will create softness and enhance a room’s ambiance. But because there’s no standard size curtain and rod for a room application, going custom is probably the best route.

7. Install a Decorative Divider

A stylish fixed screen divider is an elegant way to break up a room. It can also add an arty feature to your space. Consider your surrounding design and architectural elements when selecting the pattern, color and material for a fixed screen. You want it to feel intentional, as if the divider was always part of the space rather than an afterthought.

Here, classic midcentury modern-style breeze blocks coordinate with the Eames-style dowel leg chairs and other midcentury-inspired details.

8. Incorporate Plants

A large leafy green tree can add a lively optical barrier. The ficus tree in this home in Austin, Texas, helps separate a living area from a dining spot. Also, notice how the homeowners painted a single wall on the left a different color than the other walls to signify a transition space.

9. Put Up a Glass Partition

A glass partition helps block noise while letting light pass between spaces. If you want to obscure the view to further separate rooms, consider etched or textured glass.

10. Build a Wall

It might seem counterintuitive to put up a wall where one was previously taken down or add one to a new-build home intended to be open, but sometimes you have to be honest about how you use your home and what your needs are.

And you don’t have to add a full wall. Sometimes a pony wall or a partition wall like the orange one shown here that stops just short of the ceiling is enough. Plus, a simple non-load-bearing wall made with two-by-fours and drywall is relatively easy to put up and take down.

11. Take It to the Next Level

Changing the level of a room or creating a sunken room is a method that will definitively separate spaces within an open layout. A level change down from a main floor area can offer increased headroom and a feeling of spaciousness. A level change up will create a more intimate space.

Keep in mind that level changes in homes can be difficult to navigate for people with mobility issues, so always consider handrails or other support structures.

12. Create a Kitchen Island

If your kitchen feels too open to surrounding rooms, like if you’re trying to cook and guests or family members keep coming in and getting in the way, investing in an island could be right for you.

An island forms a barrier that keeps people on one side and the chef on the other. It also visually denotes the separation of spaces. Counter stools will further highlight the boundary point, but also consider placing a small beverage fridge on the outer side or end to let guests grab a drink without needing to come fully into the kitchen to the main fridge and potentially get in the way of the cook.

For a less permanent option, consider an island on casters that can be locked or unlocked, allowing you to push the piece out of the way to create a more open feel as needed.

13. Design an Artsy Feature

If you lack wall space to hang artwork because of an abundance of windows (not a bad problem to have), consider creating, or hiring an artist to create, an art installation that separates rooms.

In this Montana home, an installation of what appears to be birch trees and trunks cordons off the dining area from the living room. Also, notice how the level change defines the spaces, as does the large light fixture over the dining table.

14. Incorporate Sliding Panels

Sliding doors are popular for fully opening up interiors to outdoor spaces, but the concept can just as easily be applied to interior spaces.

In this San Francisco home, sliding panels can completely shut off or open up a workspace to the main living areas.

For this arrangement, you need bulkheads or another system for supporting the tracks from which the panels hang. If tracks are going in the floor, that’s something that will require extra thought and planning. Also, keep in mind that some setups might be more difficult to clean than others, so it’s worth doing your homework. If the panels permanently overlap, for example, it can be hard to clean the space between them. If the tracks are on the floor, dirt and other debris can settle in the nooks.

15. Construct a Two-Sided Fireplace

A two-sided fireplace is perhaps the coziest and most inviting option of the bunch. Fireplaces always create a striking focal point, and a two-sided option has the advantage of distributing heat and ambiance more evenly to two areas than if it was against one wall at the end of a large open room.

You can also consider bio-ethanol or electric options that don’t require a chimney.


This article was originally
published on houzz.com.